Kat's Adventures in Paper Crafting...

Card Making, Stamping & Scrapbooking

  • Twitter
  • Facebook
  • Instagram
  • Pinterest
  • RSS

A Paper Crafting Blog

  • Home
  • About
    • About Kat
    • Contact Me
    • Disclosure
  • Organization
    • Updated & Easy Stamp Storage, Organization & Inventory!
    • Embellishment Storage Solution
    • Lazy Susan from Ikea for Gemini Jr Die Cutting Machine
    • Updated Die Storage Categories in Evernote
    • Cardstock Storage and Organization
    • Updated & Easy Stamp Storage, Organization & Inventory!
    • Stencil Storage
    • Organization Archives
      • Craft Room Tour
      • Bling & Enamel Dot Storage
      • Cardstock Storage – 8.5×11
      • Cardstock Storage – 12 x 12
      • Copic Marker Storage
        • Other Copic Storage Ideas
      • Die Cut Storage
      • Die Storage (Wafer Thin Dies)
      • Evernote Inventory
      • Flair Button Storage
      • Ikea Raskog Cart
      • Ink Pad Storage
        • My Ink Swatch Album
      • Peerless Watercolor Paint Storage Solution
      • Scrap Paper Storage
      • Sequin Storage
      • Small Stencil Storage
      • Stamp Storage System
      • Stickles Storage
  • Kat’s Favorite Crafty Products
    • Kat’s Favorite Adhesives
    • Kat’s Favorite Crafting Papers
    • Kat’s Favorite Coloring Mediums
    • Kat’s Favorite Crafting Tools
    • Kat’s Favorite Die Cutting Accessories
    • Kat’s Favorite Embossing & Foiling Products
    • Kat’s Favorite Inks Pads
    • ARCHIVED Kat’s Favorites – 2019
      • Kat’s Favorite Crafty Things – 2019
      • Kat’s Favorite Adhesives 2019
      • Kat’s Favorite Cardstocks & Paper – 2019
      • Kat’s Favorite Crafting Tools – 2019
      • Kat’s Favorite Die Cutting Products – 2019
      • Kat’s Favorite Heat Embossing Products – 2019
      • Kat’s Favorite Inks & Inking Tools & Products 2019
      • Kat’s Favorite Stamping Products – 2019
  • Paper Crafting
    • Tutorials & Guides
      • How to Unmount Your Rubber Stamps with EZMount Cling Foam
      • Evernote Tutorial
      • Stamping Tutorial for Beginners Part One: Rubber Stamps
      • Stamping Tutorial For Beginners Part Two: Clear Stamps
      • How to Clean Your Stamps & Stamp Cleaner Demonstration & Review
      • How to Create a Birthday Calendar Reminder Book
      • Create an Ink Swatch Album
      • Create Your First Scrapbook page
    • All Copic Posts
      • Copic Markers FAQ & Color Combinations for Beginners
      • Copic FAQ 2 – What Cardstock to Use with Copics
      • Copic FAQ 3 – What Ink To Use with Copics
      • Copic Marker Storage
    • Kat’s Project Shares
      • My Cards
      • My Scrapbooking Layouts
  • Evernote
    • Updated Die Storage Categories in Evernote
    • Original Evernote Tutorial
You are here: Home / Scrapbooking / Kat's YouTube Videos / How to Unmount Your Rubber Stamps – 2014

How to Unmount Your Rubber Stamps – 2014

July 2, 2014 by Kat 12 Comments

This post has been updated – click here to see the new post

*Updated to add Product List on 12/29/15

Hi everyone, this post is an update and  clarification to my May 13, 2013  post which quickly explains how to unmount your rubber stamps.  This post goes into more detail and has photos and a video which should help walk you through the steps.

Wood Mounted Rubber Stamp

If you’ve got rubber stamps on blocks that are taking up too much room and are difficult to store you’ve come to the right place!  I’m going to tell you everything you need to know to unmount your rubber stamps from the wooden blocks and turn them into what we call “unmounted rubber stamps”.  First you will need some supplies:

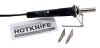
1.  The first tool in your arsenal when you begin the job of unmounting wooden stamps should always be a good HotKnife tool!  The HotKnife I use and recommend is the Walnut Hollow Professional HotKnife.  It cuts through the mounting foam like butter, yet will not cut through the rubber stamp!  It makes unmounting stamps a little bit fun even!  Below is a short video I made back in 2012 showing how to use the Walnut Hollow Professional HotKnife.

They also sell the replacement blades, (which are difficult to find) so you may want to grab a few of those when you order your HotKnife.

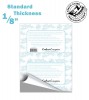
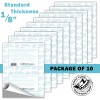
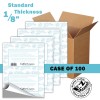
2.  Secondly, you will need mounting foam..  I always use the EZMount foam.  I prefer the 1/8″ thickness but you can buy the very thin kind that is 1/16″ if you prefer.

EZMount Cling Foam Sheets

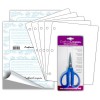
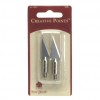
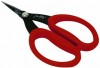
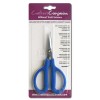
3.  Last, you need a good pair of scissors to cut through the rubber stamps (if you are cutting them down).  I recommend either Tim Holtz Tonic Scissors or EZMount Craft Scissors.  They both work equally well 🙂

EZMount Craft Scissors

Crafter’s Companion also sells a starter kit that has the storage panels, mounting foam and EZMount Scissors.  I didn’t purchase this starter kit but I use all of the products contained in it.  It may be more cost effective to purchase the starter kit than to purchase everything individually.  It’s up to you 🙂

EZMount Stamp Starter Kit

Now, let’s get started unmounting those stamps!  Get your supplies ready (Turn on your hotknife so its hot when you get ready to use it).

Unmounting Rubber Stamps, www.kathleendriggers.com

The first thing you will want to do is separate the rubber stamp from the cling foam on the back of the stamp.  Do this slowly and you should be able to pull it off in one whole piece with no issue.  However, there are some stamps that are more difficult to remove than others so if you can’t do it with your fingers, VERY CAREFULLY, use something sharp to separate the rubber from the foam and then pull it off.

TIPS:  If your rubber stamp won’t come apart from the foam, try the following:

  1. Microwave your rubber stamp face up for about 10-12 seconds.  Then try pulling the rubber stamp away from the cling foam.
  2. Very carefully, using your hotknife, cut the foam off of the rubber stamp. (Be careful not to cut or burn yourself)

Once your rubber stamp is removed from the wooden block, it will look something like this:

Unmounting Rubber Stamps, www.kathleendriggers.com

Take your EZMount Cling Foam and place the rubber stamp back down onto the sticky side of the foam.  There are two sides, one is the cling side and one is sticky.  (You can’t mistake the two because it’s VERY sticky).  Press or roll over the stamp with you fingers or a brayer to make sure it is securely stuck to the foam with no air bubbles.

Unmounting Rubber Stamps, www.kathleendriggers.com

Next, using your Tim Holtz or EZMount Scissors (they are made to cut through the sticky foam), cut around the stamp, this doesn’t have to be neat or precise because you will do that next with the HotKnife.

Unmounting Rubber Stamps, www.kathleendriggers.com

Remove the paper from the cling side of the stamp like this:

Unmounting Rubber Stamps, www.kathleendriggers.com

Lastly, using your hotknife go around the edge of the stamp just as if you were “fussy cutting” it out.  It should cut very smoothly and easily, leaving you with a newly unmounted rubber stamp that looks like this:

Unmounting Rubber Stamps, www.kathleendriggers.com

That’s it!  You’ve unmounted your first rubber stamp and it should look something like this:

Unmounting Rubber Stamps, www.kathleendriggers.com

KATVIDEO

Below is a short video I made to show you how to do this in real time.  If you have any questions about this process or any of the products I recommended, please feel free to contact me or leave a comment and I’ll get back to you asap.  Happy Stamping!

KATSUPPLIES

The supplies mentioned or used in this video are listed and linked for your convenience below.

EZMount Starter Kit (CC)
EZMount Static Cling Mounting Cushion – Single Sheet (CC)
EZMount Cling Mounting Cushion – 2 sheets
EZMount Static Cling Mounting Cushion – Pack of 4 Sheets
EZMount Static Cling Mounting Cushion – 10 Pack
EZMount Cling Mounting Cushion – Case of 100
Walnut Hollow Professional HotKnife (AZ)
Hot Knife Replacement Blades (AZ)
Tim Holtz Tonic Serrrated Snips 7″ (AZ)
EZMount Craft Scissors
InLinkz.com


« Previous article:

“A Little Dirt Never Hurt” Scrapbooking Process Video

Next Post: »

Projects to Share: Altered Letter, Scrapbook Pages and Cards

Filed Under: Kat's YouTube Videos, Stamping, Tutorials & Guides Tagged With: adhering rubber stamps to a block, cling foam stamps, ezmount cling foam, how to mount rubbers stamps to to an acrylic block, how to stamp with rubber stamps, how to unmount rubber stamps, how to unmount your rubber stamps, mounted rubber stamps, unmounted stamps, unmounting rubber stamps

Comments

  1. Trudy says

    December 25, 2014 at 7:14 pm

    How do you store them????

    Reply
    • Kat says

      December 25, 2014 at 7:30 pm

      This is how I store my stamps: http://kathleendriggers.com/kats-scrap-room-organization-storage-solutions-2014/4-stamp-storage/

      Reply
  2. Katie says

    August 8, 2015 at 12:49 pm

    What do you do with all the wood? I just unmounted A LOT of stamps using your method but now I have a ton of wood. Did you toss it, burn it, reuse it?

    Reply
    • Kat says

      August 8, 2015 at 2:40 pm

      I threw mine away but if I had a fireplace, I probably would have burned it.

      Reply
  3. kimberlyrae says

    December 29, 2015 at 11:34 pm

    Thank you for the great vid! Can the fuse tool be used?

    Reply
    • Kat says

      December 30, 2015 at 2:16 am

      You need that razor edge and it will get gunky and black and gross after use so i woudln’t.

      Reply
  4. Sara B says

    January 7, 2016 at 9:00 am

    This might be a dumb question, but why do you peel it off of the foam that’s it already on? Rather, why don’t you peel the gray foam off of the block too, and just keep that? I hope that makes sense… 🙂

    Reply
    • Kat says

      January 7, 2016 at 10:50 am

      Not a dumb question at all but it’s not “clingy” so it wont’ stick to the block, plus it has glue on it so it’s all gross. The ezmount foam is made to “cling” on one side and “stick” on the other 🙂

      Reply
  5. Lorie says

    January 14, 2016 at 4:01 pm

    Have you ever or no of someone where the foam comes off with the rubber and just mount the whole thing to the ez mount foam. Is it too much foam?

    Reply
    • Kat says

      January 14, 2016 at 10:08 pm

      that would be too much foam.

      Reply
  6. Carolann Siegle says

    March 21, 2021 at 10:23 am

    Thank You, for l have one too many wooden stamps and not all the room. Plus l have Tim Holtzs platform machine, want to use more. Looking forward to doing this. Love knowing l can do.

    Thank You again, have a great day. Carolann

    Reply

Trackbacks

  1. Stamping Tutorial for Beginners Part One: Rubber Stamps - Kat's Adventures in paper crafting... says:
    July 24, 2016 at 9:55 am

    […] that you would like but do not want the wood mount, you can always unmount them the way I do.  Here is a video and blog post tutorial showing how to do just […]

    Reply

Leave a Reply Cancel reply

Your email address will not be published. Required fields are marked *

This site uses Akismet to reduce spam. Learn how your comment data is processed.

About Kat

Kat

Grab My Blog Button

Kat's Adventures in Paper Crafting
Copy and paste this code to add my button to your blog or website!
Kat Scrappiness - Stamping, Die Cutting, Crafting Store!

Categories

  • Art Journal
  • Awesome Scraprooms
  • Brother ScanNCut2
  • Card Making
  • Contests, Giveaways & Swaps
  • Copic Markers
  • Coupons
  • Craft Room Organization
  • Craft Shopping
  • Crafty Sales & Coupon Codes
  • DIY Projects
  • Download Free Scrapbooking Inventory Forms
  • Family Life
  • FOR SALE
  • Free Cut Files
  • Free fonts
  • Free Printables
  • Home Life
  • Justin's Recovery
  • Kat's Favorites
  • Kat's Life
  • Kat's Project Shares
  • Kat's Scrap Room Organization 2014
  • Kat's Scrap Room Pics
  • Kat's Scrap Room Video Tour
  • Kat's YouTube Videos
  • Mini Albums
  • My Cards
  • My Scrapbooking Layouts
  • News & Updates
  • Organization Products
  • Organization Projects
  • Organize It!
  • Other
  • Other Crafty Projects
  • Scrap Rooms & Organization
  • Scrapbooking
  • Scrapbooking Freebies
  • Scrapbooking Products & Reviews
  • Silhouette Cameo
  • Stamping
  • Teenagers
  • Tutorials & Guides

Recent Posts

  • I have a New Puppy!!!! April 23, 2025
  • Easter & Spring Craft Sale! February 15, 2025
  • Marker Destash! February 15, 2025
  • I’m still here! December 9, 2024
  • Merry Christmas and Happy New Year from Kat! December 23, 2023

Archived Posts

Copyright © 2025 · Delightful theme by Restored 316

Copyright © 2025 · Delightful Pro Theme on Genesis Framework · WordPress · Log in