Kat's Adventures in Paper Crafting...

Card Making, Stamping & Scrapbooking

  • Twitter
  • Facebook
  • Instagram
  • Pinterest
  • RSS

A Paper Crafting Blog

  • Home
  • About
    • About Kat
    • Contact Me
    • Disclosure
  • Organization
    • Updated & Easy Stamp Storage, Organization & Inventory!
    • Embellishment Storage Solution
    • Lazy Susan from Ikea for Gemini Jr Die Cutting Machine
    • Updated Die Storage Categories in Evernote
    • Cardstock Storage and Organization
    • Updated & Easy Stamp Storage, Organization & Inventory!
    • Stencil Storage
    • Organization Archives
      • Craft Room Tour
      • Bling & Enamel Dot Storage
      • Cardstock Storage – 8.5×11
      • Cardstock Storage – 12 x 12
      • Copic Marker Storage
        • Other Copic Storage Ideas
      • Die Cut Storage
      • Die Storage (Wafer Thin Dies)
      • Evernote Inventory
      • Flair Button Storage
      • Ikea Raskog Cart
      • Ink Pad Storage
        • My Ink Swatch Album
      • Peerless Watercolor Paint Storage Solution
      • Scrap Paper Storage
      • Sequin Storage
      • Small Stencil Storage
      • Stamp Storage System
      • Stickles Storage
  • Kat’s Favorite Crafty Products
    • Kat’s Favorite Adhesives
    • Kat’s Favorite Crafting Papers
    • Kat’s Favorite Coloring Mediums
    • Kat’s Favorite Crafting Tools
    • Kat’s Favorite Die Cutting Accessories
    • Kat’s Favorite Embossing & Foiling Products
    • Kat’s Favorite Inks Pads
    • ARCHIVED Kat’s Favorites – 2019
      • Kat’s Favorite Crafty Things – 2019
      • Kat’s Favorite Adhesives 2019
      • Kat’s Favorite Cardstocks & Paper – 2019
      • Kat’s Favorite Crafting Tools – 2019
      • Kat’s Favorite Die Cutting Products – 2019
      • Kat’s Favorite Heat Embossing Products – 2019
      • Kat’s Favorite Inks & Inking Tools & Products 2019
      • Kat’s Favorite Stamping Products – 2019
  • Paper Crafting
    • Tutorials & Guides
      • How to Unmount Your Rubber Stamps with EZMount Cling Foam
      • Evernote Tutorial
      • Stamping Tutorial for Beginners Part One: Rubber Stamps
      • Stamping Tutorial For Beginners Part Two: Clear Stamps
      • How to Clean Your Stamps & Stamp Cleaner Demonstration & Review
      • How to Create a Birthday Calendar Reminder Book
      • Create an Ink Swatch Album
      • Create Your First Scrapbook page
    • All Copic Posts
      • Copic Markers FAQ & Color Combinations for Beginners
      • Copic FAQ 2 – What Cardstock to Use with Copics
      • Copic FAQ 3 – What Ink To Use with Copics
      • Copic Marker Storage
    • Kat’s Project Shares
      • My Cards
      • My Scrapbooking Layouts
  • Evernote
    • Updated Die Storage Categories in Evernote
    • Original Evernote Tutorial
You are here: Home / DIY Projects / How to Create Foiled Stamped Images and Die Cuts

How to Create Foiled Stamped Images and Die Cuts

April 19, 2015 by Kat 3 Comments

After watching another video from Jennifer Mcguire (yes I know, I watch them all! LOL), I decided to try a foiling technique she showed and thought I’d share the results with you guys!  Many of the members of our  facebook group were asking about this technique so hopefully this will answer any questions you may have.

Materials Needed:

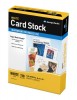
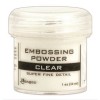
  • Ranger Superfine Embossing Powder – I used this – http://goo.gl/BZnQas
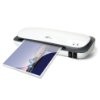
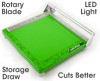
  • Laminator Machine (I used this one because it will laminate 12″ paper!  http://goo.gl/lAkoIX)
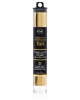
  • Foil – I used Deco Foil – http://goo.gl/JYrGFC (I have extras of the gold in my ebay store if you are interested, or you can get it online at Amazon or at Michaels)
  • Solid or thick stamped images – The foil doesn’t like to stick to thin or delicate stamped images.  See my example photos below.)
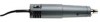
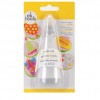
  • Embossing Powder Tool (or you can use Corn Starch) – I use this one – http://goo.gl/82W1JC
  • Versamark or other embossing ink – I use this – http://goo.gl/0Zqn8b
  • Embossing/Heat Tool – I use this one – http://goo.gl/HVHMhb

Let your machine heat up, it says for 3 minutes but I let mine heat up for about ten minutes before I used it because I wanted to make sure it was good and hot.

  1. Prepare your cardstock surface with the powder tool, this is VERY important because any place that embossing powder sticks to, will end up with foil on it!Prepare your surface
  2. Stamp your image using Versafine or embossing ink and emboss it.
  3. Cut a piece of foil and place it over your stamped image.Cover Your Stamped Image with Foil
  4. Run it through the laminating machine.  Depending on your machine, you may want to do it twice.Run Through Laminator

Now some laminators tell you to use a carrier sheet but I didn’t because the foil doesn’t stick as well.  Here is the result of the two stamped images.

Foiled Stamped Images

However, if you want to use a carrier sheet, you can just use a piece of copy paper, folded it in half and run your stamped image through the laminator inside of the folded paper.

Now let’s talk foiled die cuts!

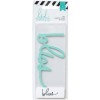
I decided I wanted to try to create a delicate die cut word using a Heidi Swapp Die.  This is how I created it:

  1. Cut a piece of cardstock big enough to fit my die and pressed the versamark ink pad all to provide full coverage of the embossing ink.
  2. Embossed the entire surface of my cardstock with clear embossing powder.
  3. Ran the cardstock through my laminator with foil on top.
  4. Die cut the word out of the foiled cardstock.

This was my result:

Foiled die cut word

Here is a short video showing the entire process:

To watch in HD click here.

Products Used in this Project Include:

InLinkz Project Manager account expired


« Previous article:

Popping in to Share a Sale With You!

Next Post: »

COPIC FAQ Part 2: What is the Best Cardstock to Use with Copic Markers?

Filed Under: DIY Projects, Kat's Project Shares, Kat's YouTube Videos, Other Crafty Projects, Scrapbooking, Stamping, Tutorials & Guides Tagged With: creating foiled cards, creating foiled die cuts, creating foiled stamped images, foil + stamping, foiled die cuts, foiling stamped and embossed images, how to add foil to a die cut, laminator, Minc

Comments

  1. Jackie says

    April 19, 2015 at 1:10 pm

    Great video, thanks for all of the tips!

    Reply
  2. Julie Blake says

    December 19, 2015 at 8:03 pm

    Thank you for the video – you explain things really well and give great tips. I think this too much effort and cost of all the different elements you have used. Wouldn’t it be easier just to get some foiled card? After all, you still have to have the die and cut out the word. Thank you – Julie

    Reply
    • Kat says

      December 19, 2015 at 10:30 pm

      Easier? yes but that’s like saying it’s easier to buy a store bought card. The fun is in the CREATING 🙂

      Reply

Leave a Reply Cancel reply

Your email address will not be published. Required fields are marked *

This site uses Akismet to reduce spam. Learn how your comment data is processed.

About Kat

Kat

Grab My Blog Button

Kat's Adventures in Paper Crafting
Copy and paste this code to add my button to your blog or website!
Kat Scrappiness - Stamping, Die Cutting, Crafting Store!

Categories

  • Art Journal
  • Awesome Scraprooms
  • Brother ScanNCut2
  • Card Making
  • Contests, Giveaways & Swaps
  • Copic Markers
  • Coupons
  • Craft Room Organization
  • Craft Shopping
  • Crafty Sales & Coupon Codes
  • DIY Projects
  • Download Free Scrapbooking Inventory Forms
  • Family Life
  • FOR SALE
  • Free Cut Files
  • Free fonts
  • Free Printables
  • Home Life
  • Justin's Recovery
  • Kat's Favorites
  • Kat's Life
  • Kat's Project Shares
  • Kat's Scrap Room Organization 2014
  • Kat's Scrap Room Pics
  • Kat's Scrap Room Video Tour
  • Kat's YouTube Videos
  • Mini Albums
  • My Cards
  • My Scrapbooking Layouts
  • News & Updates
  • Organization Products
  • Organization Projects
  • Organize It!
  • Other
  • Other Crafty Projects
  • Scrap Rooms & Organization
  • Scrapbooking
  • Scrapbooking Freebies
  • Scrapbooking Products & Reviews
  • Silhouette Cameo
  • Stamping
  • Teenagers
  • Tutorials & Guides

Recent Posts

  • I have a New Puppy!!!! April 23, 2025
  • Easter & Spring Craft Sale! February 15, 2025
  • Marker Destash! February 15, 2025
  • I’m still here! December 9, 2024
  • Merry Christmas and Happy New Year from Kat! December 23, 2023

Archived Posts

Copyright © 2025 · Delightful theme by Restored 316

Copyright © 2025 · Delightful Pro Theme on Genesis Framework · WordPress · Log in