Kat's Adventures in Paper Crafting...

Card Making, Stamping & Scrapbooking

  • Twitter
  • Facebook
  • Instagram
  • Pinterest
  • RSS

A Paper Crafting Blog

  • Home
  • About
    • About Kat
    • Contact Me
    • Disclosure
  • Organization
    • Updated & Easy Stamp Storage, Organization & Inventory!
    • Embellishment Storage Solution
    • Lazy Susan from Ikea for Gemini Jr Die Cutting Machine
    • Updated Die Storage Categories in Evernote
    • Cardstock Storage and Organization
    • Updated & Easy Stamp Storage, Organization & Inventory!
    • Stencil Storage
    • Organization Archives
      • Craft Room Tour
      • Bling & Enamel Dot Storage
      • Cardstock Storage – 8.5×11
      • Cardstock Storage – 12 x 12
      • Copic Marker Storage
        • Other Copic Storage Ideas
      • Die Cut Storage
      • Die Storage (Wafer Thin Dies)
      • Evernote Inventory
      • Flair Button Storage
      • Ikea Raskog Cart
      • Ink Pad Storage
        • My Ink Swatch Album
      • Peerless Watercolor Paint Storage Solution
      • Scrap Paper Storage
      • Sequin Storage
      • Small Stencil Storage
      • Stamp Storage System
      • Stickles Storage
  • Kat’s Favorite Crafty Products
    • Kat’s Favorite Adhesives
    • Kat’s Favorite Crafting Papers
    • Kat’s Favorite Coloring Mediums
    • Kat’s Favorite Crafting Tools
    • Kat’s Favorite Die Cutting Accessories
    • Kat’s Favorite Embossing & Foiling Products
    • Kat’s Favorite Inks Pads
    • ARCHIVED Kat’s Favorites – 2019
      • Kat’s Favorite Crafty Things – 2019
      • Kat’s Favorite Adhesives 2019
      • Kat’s Favorite Cardstocks & Paper – 2019
      • Kat’s Favorite Crafting Tools – 2019
      • Kat’s Favorite Die Cutting Products – 2019
      • Kat’s Favorite Heat Embossing Products – 2019
      • Kat’s Favorite Inks & Inking Tools & Products 2019
      • Kat’s Favorite Stamping Products – 2019
  • Paper Crafting
    • Tutorials & Guides
      • How to Unmount Your Rubber Stamps with EZMount Cling Foam
      • Evernote Tutorial
      • Stamping Tutorial for Beginners Part One: Rubber Stamps
      • Stamping Tutorial For Beginners Part Two: Clear Stamps
      • How to Clean Your Stamps & Stamp Cleaner Demonstration & Review
      • How to Create a Birthday Calendar Reminder Book
      • Create an Ink Swatch Album
      • Create Your First Scrapbook page
    • All Copic Posts
      • Copic Markers FAQ & Color Combinations for Beginners
      • Copic FAQ 2 – What Cardstock to Use with Copics
      • Copic FAQ 3 – What Ink To Use with Copics
      • Copic Marker Storage
    • Kat’s Project Shares
      • My Cards
      • My Scrapbooking Layouts
  • Evernote
    • Updated Die Storage Categories in Evernote
    • Original Evernote Tutorial
You are here: Home / Craft Room Organization / Small Stencil Storage

Small Stencil Storage

May 1, 2015 by Kat 1 Comment

I have been collecting quite a few smaller stencils over the last year or so (6×6 or smaller) and I was just throwing them into an Iris container to store them.  That wasn’t working for two reasons.

  1. I need to see what I have or I won’t use it
  2. I spray the back of my stencils with stencil adhesive and they were sticking to each other

So I’ve come up with a great solution (for me) to store my small stencils and I thought I’d share it with you.  I used products I already had around my craft room to make it.  The only thing I had to buy was the storage container and that was only around $10.00.  As you can see from the photos, I have plenty of room to grow, and there is even room in the back two compartments for lots of extra storage!

This is my new stencil storage solution:

Kat's stencil storage    Side View of Kat's Stencil Storage

Today I’m going to share how to create one for yourself.  This is what you will need to create my stencil storage system for yourself:

  • Kat's Stencil Storage ContainerA container to hold your stencils.  My biggest (of the small) stencils is about 6×6 so my container is the InterDesign Linus Pantry Organizer Binz, Divided, Large.  It measures 7 x 11 x 3.5 and I’ll show you what I store in the back two compartments in just a bit.
  • Alternative Stencil Storage ContainerAn alternative container if you do not want the extra storage spaces in back is the InterDesign Linus Stacking Organizer Bin, Large. The measurements are 7.5 x 7.25 x 6.25.
  • 110# Cheap Cardstock From Walmart
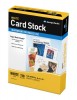
Cardstock – I used Bazzill Card Shoppe because I had alot of extra 12×12 sheets to use up but I recommend using Georgia Pacific’s 110lb cardstock (which you can get at Walmart for less than $6.00 for 150 sheets.)  I linked this product to Amazon in case you want to buy it online but it’s much cheaper at Walmart.
  • Purple Cows Laminator
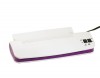
A Laminator & Laminating Pockets –  This is the one I used:  Purple Cows Hot and Cold Laminator and laminating pockets. 
  • Stencil Spray Adhesive
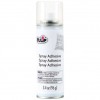
Stencil Spray – I use Tulip brand Stencil Spray Adhesive (removable) but you can use any removable adhesive spray. 
  • Kat's Label Maker - Brother P-touchLabel Maker – I use the Brother P-Touch – but you can use any label maker.

Instructions:  To create your stencil storage sheets, use the following steps:

  1. Cut sheets of cardstock to fit your stencils:   I chose to cut mine into two sizes.  The majority of my stencils fit on to a 7.5″ tall x 6.5″ wide sheet of cardstock.  (I cut mine to 6″ but you should cut them to 6.5 so you have a little wiggle room).  However, my Tim Holtz and one of my Studio Calico stencils were tall and thin and so I cut cardstock to fit them at approximately 8″ tall  x 5″ wide.
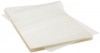
  2. Laminate the Cardstock:  Place the cut pieces of cardstock into the laminating pockets and run them through your laminator and then trim the extra laminator pocket material from your cardstock sheets.
  3. Label Cardstock Sheets:  Using your label maker, create a label for each of your laminated cardstock storage sheets.  I put the initials of the manufacturer and then the stencil name.  For example:  SSS – Chevron 
  4. Adhere Your Stencils:  After you have sprayed the back of your stencils with stencil spray, stick the stencils onto the newly laminated sheets of cardstock and place them in your stencil container.

This is what one of each of the laminated cardstock sheets looks like once they are completed and the stencils have been adhered:

completed stencil storage sheet  completed stencil storage sheet

Voila!  Your stencil storage is complete and you can now flip through and see each one!  If you want to get fancy you can use colored cardstock (you may be able to see the stencils better on colored cardstock but I didn’t think of that until AFTER I made mine!

As you can see, my Dylusions paints fit perfectly in the back two compartments of my new stencil container.  You can also fit jars of mixed media mediums such as texture paste, modeling paste, gesso, etc.!  The possibilities are endless!

KATVIDEO

Here is a short video showing how I made my new Stencil Storage.  To watch in HD click here.

KATSUPPLIES

Tulip Stencil Spray Adhesive
Purple Cows Laminator
Laminating Pockets
GP Card Stock, 8.5 x 11 Inches
Brother P-Touch Label Maker
InterDesign Linus Pantry Organizer Binz, Divided, Large
Cutterpillar Pro V3 Rotary Paper Trimmer
InLinkz.com


« Previous article:

Lookie! Lookie! At My New Blog Button & How To Get Your Own!

Next Post: »

New Blog Page : Stencil & Mixed Media Storage

Filed Under: Craft Room Organization Tagged With: how to store small stencils, mask storage, small stencil storage, stencil storage, template storage

Trackbacks

  1. - Kat's Adventures in paper crafting... says:
    August 27, 2017 at 10:01 am

    […] Small Stencil Storage […]

    Reply

Leave a Reply Cancel reply

Your email address will not be published. Required fields are marked *

This site uses Akismet to reduce spam. Learn how your comment data is processed.

About Kat

Kat

Grab My Blog Button

Kat's Adventures in Paper Crafting
Copy and paste this code to add my button to your blog or website!
Kat Scrappiness - Stamping, Die Cutting, Crafting Store!

Categories

  • Art Journal
  • Awesome Scraprooms
  • Brother ScanNCut2
  • Card Making
  • Contests, Giveaways & Swaps
  • Copic Markers
  • Coupons
  • Craft Room Organization
  • Craft Shopping
  • Crafty Sales & Coupon Codes
  • DIY Projects
  • Download Free Scrapbooking Inventory Forms
  • Family Life
  • FOR SALE
  • Free Cut Files
  • Free fonts
  • Free Printables
  • Home Life
  • Justin's Recovery
  • Kat's Favorites
  • Kat's Life
  • Kat's Project Shares
  • Kat's Scrap Room Organization 2014
  • Kat's Scrap Room Pics
  • Kat's Scrap Room Video Tour
  • Kat's YouTube Videos
  • Mini Albums
  • My Cards
  • My Scrapbooking Layouts
  • News & Updates
  • Organization Products
  • Organization Projects
  • Organize It!
  • Other
  • Other Crafty Projects
  • Scrap Rooms & Organization
  • Scrapbooking
  • Scrapbooking Freebies
  • Scrapbooking Products & Reviews
  • Silhouette Cameo
  • Stamping
  • Teenagers
  • Tutorials & Guides

Recent Posts

  • I have a New Puppy!!!! April 23, 2025
  • Easter & Spring Craft Sale! February 15, 2025
  • Marker Destash! February 15, 2025
  • I’m still here! December 9, 2024
  • Merry Christmas and Happy New Year from Kat! December 23, 2023

Archived Posts

Copyright © 2025 · Delightful theme by Restored 316

Copyright © 2025 · Delightful Pro Theme on Genesis Framework · WordPress · Log in