I’ve made a few updates since I posted pictures of my scrap room back in December so I thought I’d post a few of them here. It’s still not done (is a scrap room every finished???) but here are some individual sections of the room that may give you some ideas.
This first picture is a stamp holder that I made using Foam Board from Walmart and a hot glue gun. Actually, my stepdad made it for me. It didn’t come out real pretty but it works and that’s what matters for now. I’ll give you a link to the instructions below the picture.
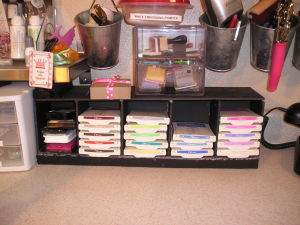
Mine is small but the original project is for a larger stamp pad holder. The link and instructions are here: Foam Board Stamp Pad Holder. Here is a picture of one that turned out pretty (hehe).
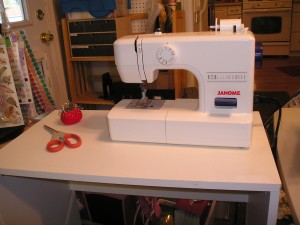
This next picture is my new Janome 11542 Sewing Machine and my $5.00 sewing table! (Thrift store find). I got the Janome at overstock for around $60-$70.
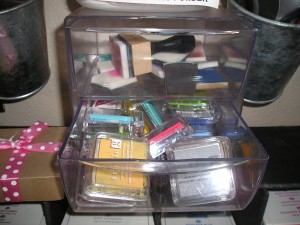
This photo is a little container I found at Goodwill for $0.99 and in the top drawer it holds all of the little foam distressing pads and in the bottom are all of my $1.00 inks from Studio G. (They work surprisingly well for $1.00!)
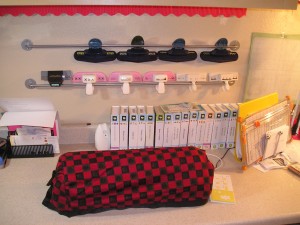
This is my Cricut Cutting Area. As you can see, my cartridges are in their boxes (UGH), lined up on the counter behind the cricut. My cutting mats hang on a little 3m hook on the wall and my border punches hang on Ikea rails on the wall as well. My regular punches are on another wall. I don’t have a lot of wall space so I had to make do. The cricut dust cover was my first sewing attempt and I messed it up but the material was so cute (paw prints) that I’m using it anyway!
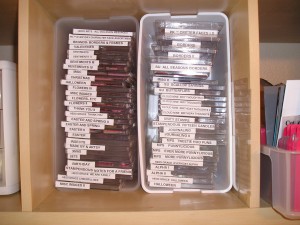
This is how I (temporarily) am storing my unmounted and clear stamps. I have them all in cds which I love and the ones that are too long (border stamps) are in little plastic containers I found at a thrift store and fit in there nicely with the cd cases. They are all in a couple of bins I found at Target but I don’t like how they are stored right now. When I find a better solution, I’ll post an update but for now, it works.
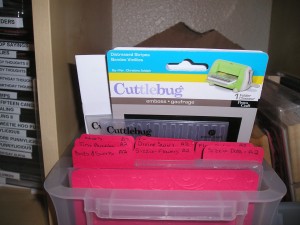
I only buy the embossing folders that I think I will use so I don’t have a ton of them. This is how I store the ones I do have however. The ones that are A2 sized are in little folders (okielady I think made a cutting file for the folder) and the rest that are larger are just standing up in the back.
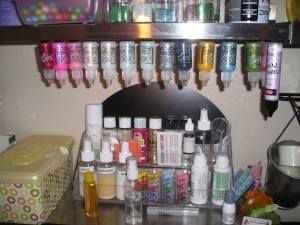
This is how I store my stickles. I put little velcro dots on them (found at Walmart in the sewing section) and I velcro them to the bottom of my shelf
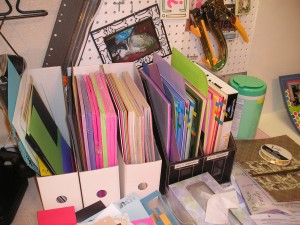
This is how I store my 8 1/2 x 11 paper. I like to have it on my desk because I reach for it so often to cut with my cricut and make cards. I have my cheap paper in another container on the other side of where I sit but this section holds scraps that need to be put away, Paper Trey Ink Cardstock, Stampin Up Cardstock and more cheap cardstock from Michaels.
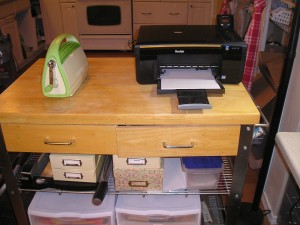
I have a kitchen Island that I found at Goodwill for very little money and on the top I store my printer and my Cuttlebug. On the middle shelf I store ribbon boxes and a big cutter and some pictures and on the bottom I store my scrap paper in these plastic storage containers. Each drawer is labeled according to what color goes in each drawer. This works wonderfully for me and I use my scrap paper first before reaching for a new sheet of cardstock.

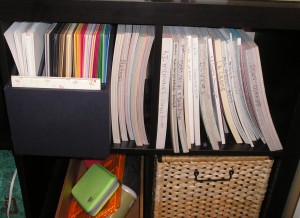
12 x 12 Paper Pack and Cardstock Storage – I store my paper packs and cardstock in the little cubbies of an Ikea Expedit. As you can see, I label the paper packs with the name (just write it with a black sharpie pen) so that I know what stack it is. My cardstock is in a container I found at Goodwill (I know I’m the thrift store queen!). My 12 x 12 patterned paper that is not in a stack is stored in another section in these Display Dynamics Paper Holders.
The basket you see holds all of my scrapbook pages that need to be put into albums (It is literally bursting at the seams right now!)
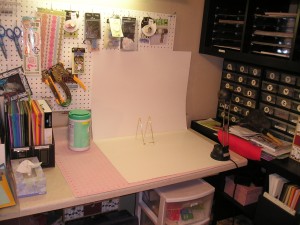
I cannot afford a photo box (nor do I need one) for my cards and scrapbook pages so I made my own by using two pieces of white Posterboard from the dollar store, a plate holder and a light. It works great! (Although I could still use more light). The little boxes you see to the right of the photo area are old tool/screw holders that I painted and turned into a chipboard holder. Each drawer contains a letter of the alphabet.
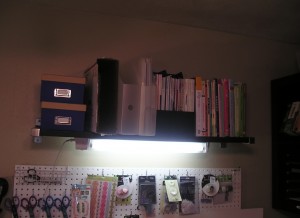
This shelf which is hung above my pegboard holds all of my scrapbooking idea books and magazines. I also have some photo boxes up there as well. (There are photo boxes everywhere in my scrap room!)
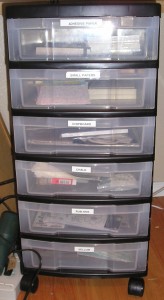
I found this storage unit below at Goodwill for $6.00! These are around $40.00 or more in Michael’s so I was thrilled to get this! The 1st drawer holds my adhesive papers, the 2nd drawer holds smaller papers that aren’t in stacks, the 3rd drawer holds raw chipboard both in sheets and die cuts. The 4th drawer holds my chalks, 5th drawer holds rub-ons (I don’t have a lot of those) and the last drawer holds vellum. This little unit just slides right underneath my counter top for easy storage.
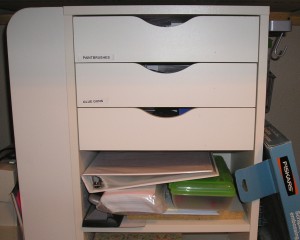
I found this white storage cart (2 of them actually) on craigslist. They were originally from Ikea but Ikea has a newer model and doesn’t sell this model anymore. It has storage on three sides of the cart so it’s pretty handy. I use one in my bedroom as a nightstand and the other in my craft room. The first drawer has my paintbrushes in it, the second has my glue gun and hot knife and the third drawer has some small wooden embellishments that need to be altered. The shelves below contain a mish-mash of stuff right now because I need to organize it.
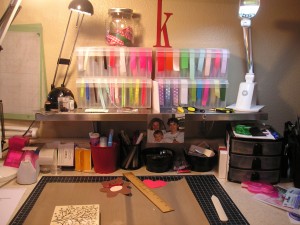
And last but not least, this is my work station and what I look at when I’m sitting at my crafting area. About 95% of my ribbon are in boxes but I’m trying to get away from that so I started buying these ribbon containers when I found them (at Goodwill!) and everytime I buy new ribbon on a spool, I stick it in there. This isn’t working out too well either though because I can’t seem to find anymore of these containers so I’m going to have to come up with something new. I like being able to see my ribbon and I like having it on the spool but since I have 8-10 boxes of ribbon on cards, I have yet to figure out a good ribbon storage solution.
There are so many other things in my craft room that I haven’t shown you yet such as embellishments, etc., but I am doing this in pieces until I get my room just the way I want it. When and If that ever happens I promise to do a full room post or maybe even a video (I’ve never done a video before) tour. In the meantime, if you have any questions about how I organize or store my things, feel free to contact me. If you have any tips, please let me know. I’m always open to suggestions!
Thanks for looking at my scrap room! Have a great day!
Looking good Kat!
Very nice workspace you are creating! The ribbon boxes look like the ones they sell at Walmart. I like the fact that you can see thru them also. thanks for sharing. I’m looking forward to some more of your great ideas!
Kat, this looks great! I’m going to have to start hitting the Goodwill store each week, what finds you’ve gotten. I’m jealous, the closest Ikea is in Minneapolis, MN which is 6+ hours away! I’m hoping we get one in Kansas City sometime soon. I love the way you’re storing your stickles and your embossing folders, going to steal your ideas. The kitchen Island is fantastic and that black cart is great. I do the same thing, can’t seem to part with any scraps unless they are really thin or little. Thanks for the link, love your banner!
Pam F.
My favorite idea is the Velcro dots on the glitter glue!!! I didn’t think I had a place to do the same thing but I do. 🙂 My husband needs to put a brace under one of my stamp shelves then I’ll have the perfect place. THANK YOU FOR SHARING YOUR IDEA. GOD BLESS YOU!