Kat's Adventures in Paper Crafting...

Card Making, Stamping & Scrapbooking

  • Twitter
  • Facebook
  • Instagram
  • Pinterest
  • RSS

A Paper Crafting Blog

  • Home
  • About
    • About Kat
    • Contact Me
    • Disclosure
  • Organization
    • Updated & Easy Stamp Storage, Organization & Inventory!
    • Embellishment Storage Solution
    • Lazy Susan from Ikea for Gemini Jr Die Cutting Machine
    • Updated Die Storage Categories in Evernote
    • Cardstock Storage and Organization
    • Updated & Easy Stamp Storage, Organization & Inventory!
    • Stencil Storage
    • Organization Archives
      • Craft Room Tour
      • Bling & Enamel Dot Storage
      • Cardstock Storage – 8.5×11
      • Cardstock Storage – 12 x 12
      • Copic Marker Storage
        • Other Copic Storage Ideas
      • Die Cut Storage
      • Die Storage (Wafer Thin Dies)
      • Evernote Inventory
      • Flair Button Storage
      • Ikea Raskog Cart
      • Ink Pad Storage
        • My Ink Swatch Album
      • Peerless Watercolor Paint Storage Solution
      • Scrap Paper Storage
      • Sequin Storage
      • Small Stencil Storage
      • Stamp Storage System
      • Stickles Storage
  • Kat’s Favorite Crafty Products
    • Kat’s Favorite Adhesives
    • Kat’s Favorite Crafting Papers
    • Kat’s Favorite Coloring Mediums
    • Kat’s Favorite Crafting Tools
    • Kat’s Favorite Die Cutting Accessories
    • Kat’s Favorite Embossing & Foiling Products
    • Kat’s Favorite Inks Pads
    • ARCHIVED Kat’s Favorites – 2019
      • Kat’s Favorite Crafty Things – 2019
      • Kat’s Favorite Adhesives 2019
      • Kat’s Favorite Cardstocks & Paper – 2019
      • Kat’s Favorite Crafting Tools – 2019
      • Kat’s Favorite Die Cutting Products – 2019
      • Kat’s Favorite Heat Embossing Products – 2019
      • Kat’s Favorite Inks & Inking Tools & Products 2019
      • Kat’s Favorite Stamping Products – 2019
  • Paper Crafting
    • Tutorials & Guides
      • How to Unmount Your Rubber Stamps with EZMount Cling Foam
      • Evernote Tutorial
      • Stamping Tutorial for Beginners Part One: Rubber Stamps
      • Stamping Tutorial For Beginners Part Two: Clear Stamps
      • How to Clean Your Stamps & Stamp Cleaner Demonstration & Review
      • How to Create a Birthday Calendar Reminder Book
      • Create an Ink Swatch Album
      • Create Your First Scrapbook page
    • All Copic Posts
      • Copic Markers FAQ & Color Combinations for Beginners
      • Copic FAQ 2 – What Cardstock to Use with Copics
      • Copic FAQ 3 – What Ink To Use with Copics
      • Copic Marker Storage
    • Kat’s Project Shares
      • My Cards
      • My Scrapbooking Layouts
  • Evernote
    • Updated Die Storage Categories in Evernote
    • Original Evernote Tutorial
You are here: Home / Brother ScanNCut2 / Ways to “Re-Stick” Your Brother ScanNCut Mat

Ways to “Re-Stick” Your Brother ScanNCut Mat

December 3, 2015 by Kat 4 Comments

How to Restick your brother scanncut cutting mat

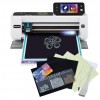
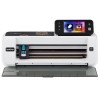
As you I recently purchased a Brother ScanNCut machine and while I LOVE it, there is one thing I do NOT love and that is the mat.

Problem #1 and Solution:  The mat is too sticky at first, which is not a problem because you just take a clean tshirt and “pat” it all over the mat to remove some of the stickiness and voila!  Problem solved.

Problem #2 and Three Simple Solutions:  After a few cuts, the mat loses it’s stickiness altogether!  Your paper will NOT stick when you run it through the machine! So today I’m sharing a few ways that I “Re-Stick” my mat to avoid buying a new one!

  1. First, try wiping your mat down with a baby wipe. This will not only clean the mat but will “reactivate” some of the stickiness.  When the baby wipe no longer works, try one of the two following methods.
  2. **My Personal Preference is using a Zig Two Way Glue Pen or click here (JUMBO Size works best) – Scribble the glue all over your mat, wherever you want it to be sticky.  The great thing about this adhesive is that if you let it air dry it because a “removable” adhesive.  Once the adhesive has dried, go ahead and start using it.  Works like charm!
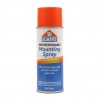
  3. Using a Removable Spray Adhesive – Take your mat outside (you don’t want to spray this adhesive in a closed in space), cover the outside edges with painters tape so just the area you want to “re-stick” is showing.  Then spray the removable adhesive in a consistent, even manner all over the mat.  Following the instructions on your spray adhesive can, let it dry and then you can use it again!
  4. *UPDATED 12/21/15 to add the following:  I’ve been told my by sister that Aleene’s Tack it Over & Over works VERY well for resticking your mat.  This is how you use it.
    • Dilute Aleene’s Tack It Over & Over with 50% adhesive and 50% water and mix.
    • Using a foam brush, paint it all over the surface of your cutting mat.
    • Let it dry for 20 minutes
    • Apply a second coat of adhesive
    • Let it dry for 24 hours
    • You are good to go!

How To Remove the Old Adhesive From Your Cutting Mat

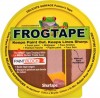
Here are instructions for using a removable spray adhesive.  First you want to tape around your mat, so that the borders are covered up with masking or painter’s tape.  I use frog tape.

Tape the border of your mat

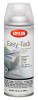
Next, you will want to remove the old adhesive using an adhesive remover spray.  I use this but you can use any of these, or Goo Gone Spray as well.

adhesive remover

After spraying your mat with adhesive remover, use a scraper or an old gift or credit card to scrape off the adhesive.   You will want to wipe off your mat with a baby wipe or other cleaning wipe and dry it well.

wipe mat down with baby wipes

The, using one of the methods listed above, add new adhesive to your mat.  Remove the tape and Voila! Your mat is sticky again!


KATSUPPLIES

Goo Gone Spray Gel 12 oz
Crafter’s Companion Stick Away Adhesive Remover, 5.9-Ounce
Goo Gone 2 oz bottle
Silhouette Scraper
Kirkland Baby Wipes 900 ct (AZ)
Aleene’s Tack it Over & Over 4oz
Zig 2-Way Glue Pen Bulk Jumbo Tip (KS)
Zig Two Way Jumbo Glue Pen
Frog Tape (AZ)
Krylon Easy Tack Repositionable Adhesive Spray
ELMERS Repositionable Mounting Spray Adhesive
Brother ScanNCut Standard Mat
(AZ)
(HS)
InLinkz.com


« Previous article:

Pet/Dog Mini Album – Project Share

Next Post: »

Brother ScanNCut Blade and Pressure Settings Guide & Blade Troubleshooting Tips

Filed Under: Brother ScanNCut2 Tagged With: aleene's tack it over & over, brother scan n cut mat, brother scanncut cutting mat, brother scanncut mat, how to clean your cutting mat, how to make your cutting mat sticky again, how to restick your brother scanncut mat, restick cameo mat, restick cricut mat, restick die cutting mat, restick your cutting mat, spray adhesive, zig two way glue pen JUMBO

Comments

  1. Aileen says

    December 3, 2015 at 3:42 pm

    thank you soooo much for sharing these tips. I am soon to be the proud owner of a Scan and Cut and any tips that can help are much appreciated. I have the spray adhesive for my stencils so already ready for it. Yahooooo

    Reply
  2. Ali says

    November 26, 2016 at 8:40 am

    excellent, I never even thought of the zig glue. I fell out with my scan n cut very rapidly as I was having to put stick n spray on everything, but this meant that it all stayed sticky so it was no good for cutting card blanks. I’ve just cleaned it and covered it in the zig glue and I’m looking forwards to reacquainting myself with it! Thank you 🙂

    Reply
  3. Evgeniy says

    March 29, 2023 at 9:28 am

    This is an ancient post, bit helped me a lot, thank you for sharing!

    One more idea on the “removing old adhesive”: I tried some isopropanol for reactivation of the adhesive and it had the opposite effect.

    However, if you actually intend to remove the adhesive, isopropanol is awesome! 🙂

    Reply

Trackbacks

  1. Kat's Favorite Adhesives - 2017 - Kat's Adventures in paper crafting... says:
    April 21, 2017 at 12:54 pm

    […] How To Restick Your Cutting Mat […]

    Reply

Leave a Reply Cancel reply

Your email address will not be published. Required fields are marked *

This site uses Akismet to reduce spam. Learn how your comment data is processed.

About Kat

Kat

Grab My Blog Button

Kat's Adventures in Paper Crafting
Copy and paste this code to add my button to your blog or website!
Kat Scrappiness - Stamping, Die Cutting, Crafting Store!

Categories

  • Art Journal
  • Awesome Scraprooms
  • Brother ScanNCut2
  • Card Making
  • Contests, Giveaways & Swaps
  • Copic Markers
  • Coupons
  • Craft Room Organization
  • Craft Shopping
  • Crafty Sales & Coupon Codes
  • DIY Projects
  • Download Free Scrapbooking Inventory Forms
  • Family Life
  • FOR SALE
  • Free Cut Files
  • Free fonts
  • Free Printables
  • Home Life
  • Justin's Recovery
  • Kat's Favorites
  • Kat's Life
  • Kat's Project Shares
  • Kat's Scrap Room Organization 2014
  • Kat's Scrap Room Pics
  • Kat's Scrap Room Video Tour
  • Kat's YouTube Videos
  • Mini Albums
  • My Cards
  • My Scrapbooking Layouts
  • News & Updates
  • Organization Products
  • Organization Projects
  • Organize It!
  • Other
  • Other Crafty Projects
  • Scrap Rooms & Organization
  • Scrapbooking
  • Scrapbooking Freebies
  • Scrapbooking Products & Reviews
  • Silhouette Cameo
  • Stamping
  • Teenagers
  • Tutorials & Guides

Recent Posts

  • I have a New Puppy!!!! April 23, 2025
  • Easter & Spring Craft Sale! February 15, 2025
  • Marker Destash! February 15, 2025
  • I’m still here! December 9, 2024
  • Merry Christmas and Happy New Year from Kat! December 23, 2023

Archived Posts

Copyright © 2025 · Delightful theme by Restored 316

Copyright © 2025 · Delightful Pro Theme on Genesis Framework · WordPress · Log in