So I’ve been promising pictures of my new scrap room when it was finished and it’s about 95% completed now so I thought I’d share some photos with you. I’ll be doing a scrap room tour video in the next few days or so as well. When you walk into the room from the hallway, on your right side, you see this:
Then on the right side of the room, you will see this:
There are three work stations here, where my son is sitting is the computer/sewing station, next to him in the middle is the stamping station and on the far right is my regular work station. If you turn around you will see the island scrapbooking desk which is standing room only :). I use that mainly to die cut at (that’s what I do most of the time because of my home business, Kat Scrappiness)
This is a picture of the scrapbooking island desk.
This is a picture of the scrapbooking island from the end.
I made this desk for $42.00 total. For more info on how I did that, check out this post here.
Next, when you look to the left of the room you will see my storage unit from costco. It’s not pretty but it sure is functional!
Sizzix Die Storage
Going down along the left side wall where the windows are, are three jetmax cubes that contain my sizzix dies for Kat Scrappiness. Here is a picture:
Expedit Unit
Next to it (behind the big, ugly, red kool-aid juice stain on the carpet lol) is an Ikea Expedit bookshelf which holds my paper and much more. Here is a picture of that.
As you can see my spray box (where I mist and spray with inks, etc.) is on top along with my typewriter and printer. The top shelves hold my good solid cardstocks (American Crafts, Core’dinations, Bazzill, etc) and the bottom row contains everything from a couple of DCWV type paper pads to chipboard, cheaper 12×12 cardstock and storage products.
At the end of the room on either side of the fireplace are two more Ikea Expedit bookshelves that hold a lot of miscellaneous things in those black and white fabric boxes. Here are pictures:
Trim Storage
The first black box holds trim, trim and more trim as shown in this picture:
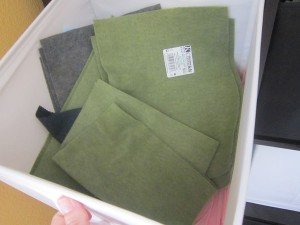
The white box holds wool blend felt pieces (and a can of canned air lol)
The other white box holds more felt pieces
Adhesive Storage
The next box holds my adhesives (extras):
And the last box in this expedit contains items I’m saving up for my next youtube subscriber giveaway!
Paper Collection Storage and Chipboard Letter Storage
Then, in front of the fireplace are two fabric boxes which contain all of my paper collections and my chipboard letters which are separated by letter and stored in those tool sorters found at Home Depot or Lowes, etc.
On the mantel above the fireplace are my buttons. I ran out of button jars so they are all stacked up in different jars right now. I’ll be fixing that on payday when I take a trip to Ikea to get more burken jars! This is what they look like right now.
Ribbon and Punch Storage
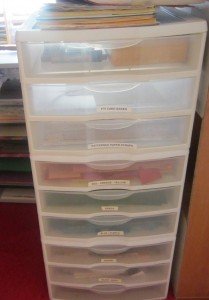
Then in front of my fireplace (Can you tell I ran out of room?!) is my Ikea Alex Drawer Unit. It holds ribbon and punches, etc. Here are some pictures of it and what is in each drawer.
Top drawer contains ribbon
2nd drawer contains more ribbon
The third drawer has border punches.
The fourth drawer has regular punches in it.
The next drawer has more ribbon and some miscellaneous items in it.
And finally, the last drawer has a little bit of everything in it!
Then, there is the expedit on the right side of the room.
The white box contains felt scrap pieces
The black box just contains extra storage products
The red metal bin contains xyron machine refills
The wicker basket on the bottom contains layouts that need to be put away into their albums (I know there’s a lot!)
Scrap Storage
Then when you turn around to the island, underneath you will see that I store my scraps there by color.
Washi Tape Storage
One new addition to my room which I forgot to mention is my new Harbor Freight Spinning “thingie” that I got to organize my washi tape (among other things). It costs $20.00 and is made of metal. It’s a great buy but buyer beware…it contains about a zillion little pieces and is tedious to put together! I decorated mine with red and white polka dot washi tape 🙂
Then when we take closer look to the right side of the room you will see the three stations, the first is my sewing station.
Next to that is my stamping station.
And last is my main work station where I do a little bit of everything including scrapbooking 🙂
YouTube Camera Set Up
That pole that you see hanging across the top is my camera setup. That’s how I film my youtube videos. It’s a flagpole holder thingie with a dowel stuck in it and my camera is attached to it using a gorillapod and some duct tape (LOL) Hey, whatever works right?! If you want to see this set up in more detail, leave a comment or contact me and I’ll do a more in depth blog post and/or video showing you exactly how it is setup and how it works.
How I store my Stickles and Liquid Pearls
A couple of things in more detail include how I store my liquid pearls and stickles. I use a velcro dot and attach them to the underside of my shelf.
Die and Nestabilities Storage
I store my dies and nestabilities in binders that I made on a shelf along with my embossing powders which are stored in rubbermaid containers.
Distress Ink Storage
My distress inks are stored in mediastix (from target.com) on the wall. They are made for cds/dvds but they work perfectly for my distress inks. I found this idea on scrapbook.com. (not my original idea).
What’s in my Jetmax Cubes?
A few people have asked what I store in my Jetmax cubes so I thought I’d just give you a quick list rather than taking pictures of every drawer (UGH LOL)
From the sewing station moving right—->
Doilies
Empty Brad and Eyelet storage containers
Circle Cutter
Owires (two drawers)
Stamps (four drawers in one cube)
Patterned papers that don’t go into a collection in the hanging file Jetmax cube
Stamps (eight drawers in two cubes)
Misc. stuff in four slots in paper holder
Glitter & Microbeads
i-Top and i-Top refills
Twine
Also, at the end of my island scrapbooking desk I have another closetmaid cube shelf and I have all sorts of things stored in there including copy paper, envelopes, photo paper, cards, sizzix plates (extras), etc.
My storage unit from Costco holds a lot of product including all of my ephemera, label stickers, letter stickers, thickers, clay, paint, mists and sprays (glimmer mist, etc.), Paper, Paper and more Paper, all 8.5 x 11. There is a lot more but you’ll have to watch my video to see what else is in there because I can’t remember off the top of my head. (is that a bad sign?)
I also have part of a spare room that I use to store felt and all of my Kat Scrappiness products that just don’t fit in this room. I use the closet for my felt and I have several clip it ups that I use for products and they are all stored by category. Maybe I’ll do a room tour of that room sometime as well!
I’ve tried to include as much as I can in this overview but it’s impossible to show how I store everything so for a more detailed view, check out my scrap room tour video. 🙂 If you want to know how I store or organize something specific, just leave a comment and let me know and I’ll be happy to show you.
Thanks for stopping by and making it this far! I know this was a long post!
Video Coming Soon!


You did a great job Kat. I love it all. Got some ideas from ya too. Thanks for sharing your new space!
totally awesome! can’t wait for the video tour.
WOW, Kat! It looks GREAT!! I bet that was alot of work. I love it. I know you will be happy in your new room and create lots of nice things! Can’t wait to see the video too. Thanks for sharing!! 🙂
oh my goodness! THis looks amazing!!!
Wow! Everything looks great!! Thanks for sharing! I might have a few more questions for you later, but for now, where did you happen to get those black wire baskets from on your peg board? I was thinking of using them for pens and markers since I heard from somewhere that it’s best to store them laying down? Have you heard that before? Thanks again for sharing! Looks like you’ve got it all covered!! Great job!
I just sent you an email but I got the black wire baskets from walmart in the tool aisle. Also, here’s how I store my copic markers: http://kathleendriggers.com/?s=copic+storage