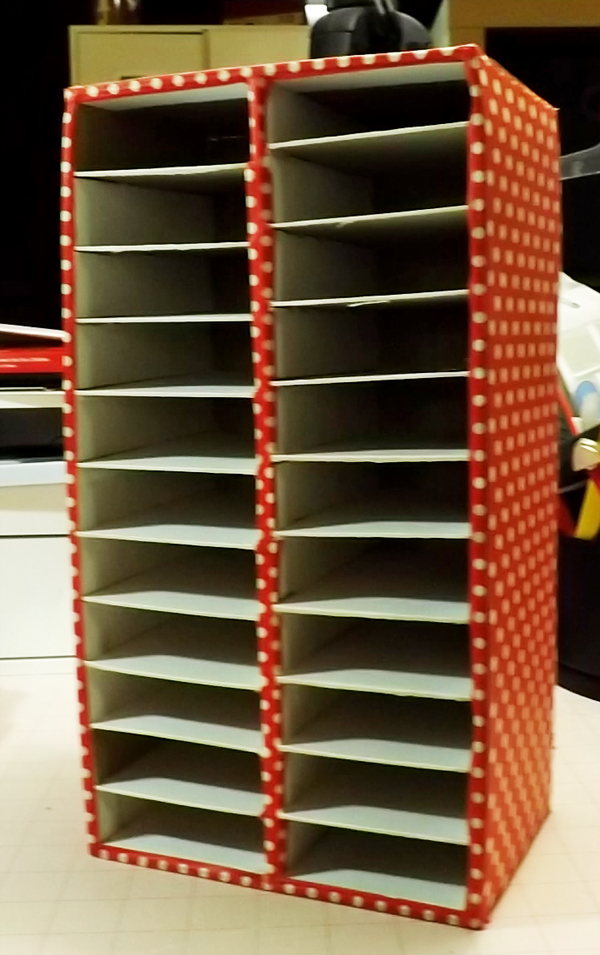
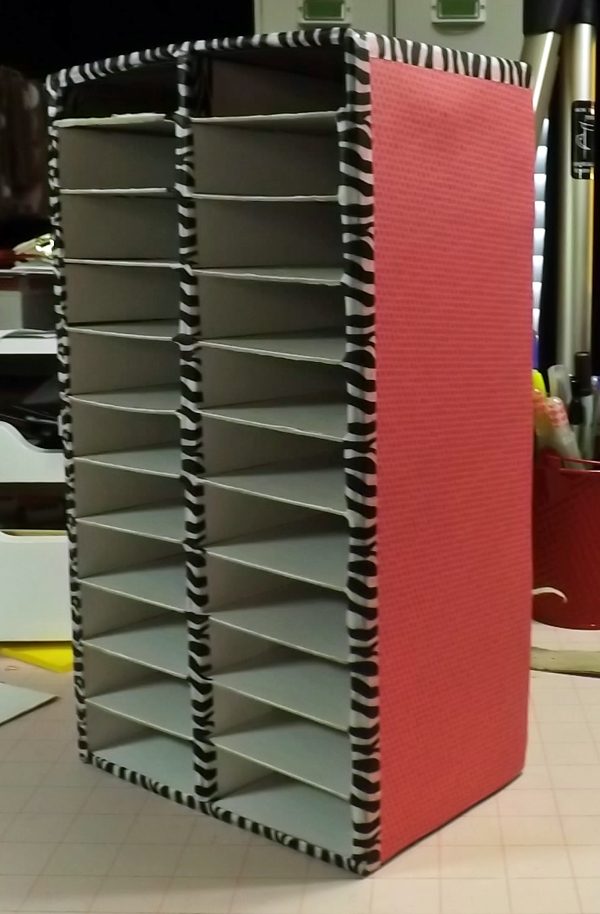
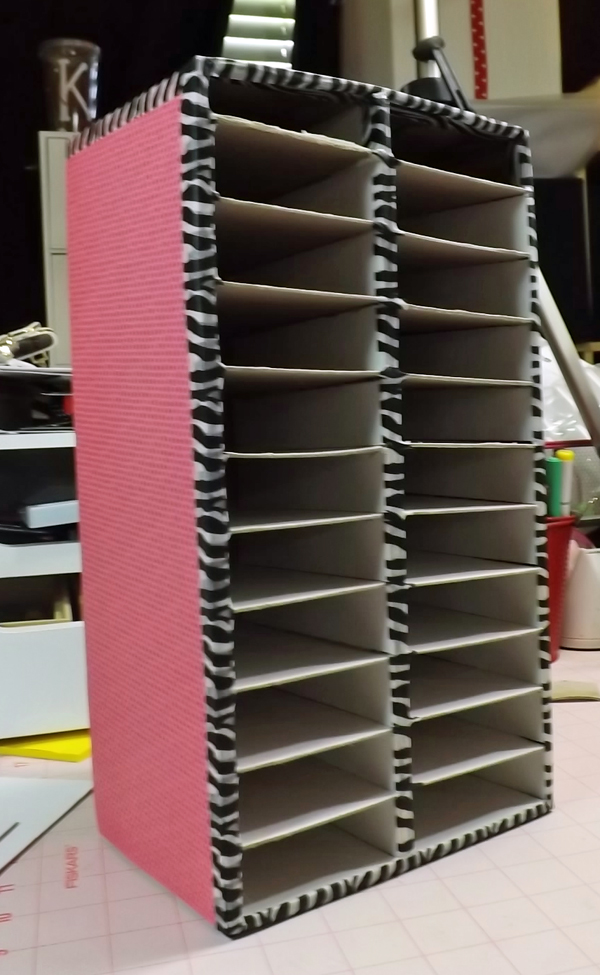
Hi everyone, today I want to share a project I just completed as well as provide step by step instructions just in case you want to make your own ink pad storage. My new ink pad storage can hold 22 full size ink pads. The first picture below shows the first one I made in red and white polka dots. The second and third pictures show the 2nd one I made in pink and zebra (which didn’t come out as well).
Here is a picture of my completed ink pad storage unit, filled up with inks and sitting alongside my other inks:

If you want to make your own ink pad storage, here are the instructions for the one I made. (Hopefully you won’t mess up like I did the second time LOL)
*Updated 6/28/13 to add: If I were remaking this ink pad holder today, after having used my current one for a bit, I would make it less deep. I have a difficult time getting the ink pads out if they get pushed back too far. So my suggestion is to change the measurements anywhere it says 4 1/2″ to maybe 4″. 🙂 Hope that helps!
Start out with four pieces of cardboard (you can cut up any box) that measure:
- Left and right sides: 4 1/2″ x 12″
- Top and Bottom: 4 1/2″ x 6 1/2″

Next you will need some chipboard (I used white). You will need to cut them in the following quantities and sizes:
- 2 pieces that measure 4 1/2″ x 12″
- 44 pieces that measure 4 1/2″ x 1″
- 22 pieces that measure (approximately) 3 1/8″ x 4 1/2″ (don’t cut these until you get to step 9!)

You will also need:
- A hot glue gun
- Wide tape ( you can use duct tape or packing tape, I used clear packing tape)
- Paper to decorate your ink pad storage container with.
- Washi tape to match your paper
- Adhesive of your choice (I used spray adhesive, scor-tape and my atg gun)
- A razor or craft knife (new blade – this is important)
So now that you have everything you’ll need, lets get started!
- Using your hot glue gun, glue the bottom piece to the back piece.
- Glue the sides to the bottom and back.
- Take the two pieces of chipboard that measure 4 1/2″ x 12″ and glue them together.
- Measure the bottom and top pieces and make a mark where the half way point is at 3 1/4″.
This is what your box should look like at this point.
- Now, you have a complete box but; you will need to make it more sturdy so, using the tape you chose, go over the outside edges on all sides with your tape. Make sure to pull the tape taught but not overly so, or you will end up with the crooked corner that I ended up with at the top! When you are finished, it should look like this:
- Using your preferred adhesive, (I used scor-tape for this part), go around the front edges of ink pad storage box with your adhesive and then cover it with washi. If you just use washi straight to the box, it won’t stick, you need that extra adhesive first, then the washi next.
- (You can do this step now or wait until the box is complete and do it then if you’d rather have the washi on top of the paper. If you want the washi under the paper, do it now. Now you are going to do the same thing to the outside edges of the box. For this part, I used spray adhesive and it worked really well. So cover the edges with adhesive and then washi tape.
- Next we we are going to turn our focus to the inside of the box. Take two of the 4 1/2″ x 1″ in strips of chipboard and hot glue them to the inside and outside of the left side of your box.
- Now is the time to measure the inside bottom side of both the left and right sides of your box. If they measure 3 1/4″ each then you’ve put it together perfectly and you can go ahead and cut 22 pieces of chipboard at 3 1/4″ x 4 1/2″. However, if you are like me and it didn’t come out perfectly, use your measurements to cut 11 pieces of chipboard for the right side and 11 pieces of chipboard for the left. It should be the width x 4 1/2″.
- Then, using one of the pieces of chipboard you just cut, put hot glue on the top of the strips you adhered in the previous step and quickly add the new piece of chipboard to the top. Press on it to make sure it’s sitting directly on the side strips and hold down for a few seconds until the glue dries. Now you have your very first section for your ink pads completed!
- You are going to repeat this process back and forth from the left side to the right side and back to the left, etc., until you’ve reached the top. You should have eleven 1″ slots on each side when you are finished and it should look something like this: (with or without the washi depending on when you decided to put that on.)
- The hard (and tedious) part is over and now it’s time to decorate your box! Using spray adhesive (or whatever type of adhesive you chose), cut your desired patterned paper to the following sizes:
- Two pieces that measure 4 1/2″ x 12″ for the sides of your box
- One piece that measures 6 1/2″ x 4 1/2″ for the top of your box. (You can decorate the back and sides if you want but mine is up against a wall so I didn’t bother with this step.
- Spray the sides and top with adhesive and cover with patterned paper. I also sanded the edges of the corners of my paper but that is a step you can step if you prefer.
- If you skipped step #6 above, now is the time to do that step and it should look like this:


VOILA! You are finished and now you have a customized, handmade ink pad storage solution!
I did film the process of making the box, but need time to edit and upload it so please check back soon or visit my YouTube channel to watch me make this ink pad storage box.
Now for the giveaway, I know it’s not perfect but I’m giving away the ink pad storage box that I made for this tutorial (the pink one with the zebra). All you have to do to win is leave a comment on this post and tell me how you store your ink pads right now and let me know that you would like to be entered in the giveaway. I’ll leave this post up for two weeks and on or around July 6th, I’ll choose a winner using random.org. I will contact the winner via your comment so make sure your email is correct when you enter. I’ll also post the winner here on my blog and on my Facebook page.
Thanks for stopping by my blog today. I hope this tutorial helps you create an awesome ink pad storage unit of your own. If you make one of our own, please let me know because I’d love to see what you create!
Thanks for the tutorial. I have been storing mine in plastic boxes. Have tAKE all out to see what color they are. Would love to win this.
OMGoodnesss! What a great tutorial! Love the idea of making your own 🙂 SO clever!
What a super tutorial – it looks great 🙂
This is so cool, thanks for sharing how to make it.
Great tutorial – I’ve pinned it so I can make one, since my pads are stored in a box and this would be much better!
Neat! I’ve pinned this for future reference!
Thanks 😉 süper! very very good 😀